How to Build a Decentralized Exchange (DEX) Like Uniswap in Less than One Hour
Uniswap is an open-source exchange, it could be easily built by the existing codes that exists on GitHub and etherscan.
Building an Uniswap exchange is simple. Firstly, we need three sets of code:
- Factory Contract
- Routing Contract
- Front-end code
Factory Contract is used for the LP token creation, it will create an LP token for every pair of the swap. The Routing Contract is the one called by the user to interact with the factory contract. The Factory Contract source code can be found here: https://etherscan.io/address/0x5c69bee701ef814a2b6a3edd4b1652cb9cc5aa6f#code
If you are not deploying the code on the main Ethereum network, you need to add the following line after line 398 of the above source code:
bytes32 public constant INIT_CODE_PAIR_HASH = keccak256(abi.encodePacked(type(UniswapV2Pair).creationCode));

We would recommend using Remix, if you are unfamiliar with it, Blockchain.News previously published a guide on using Remix.
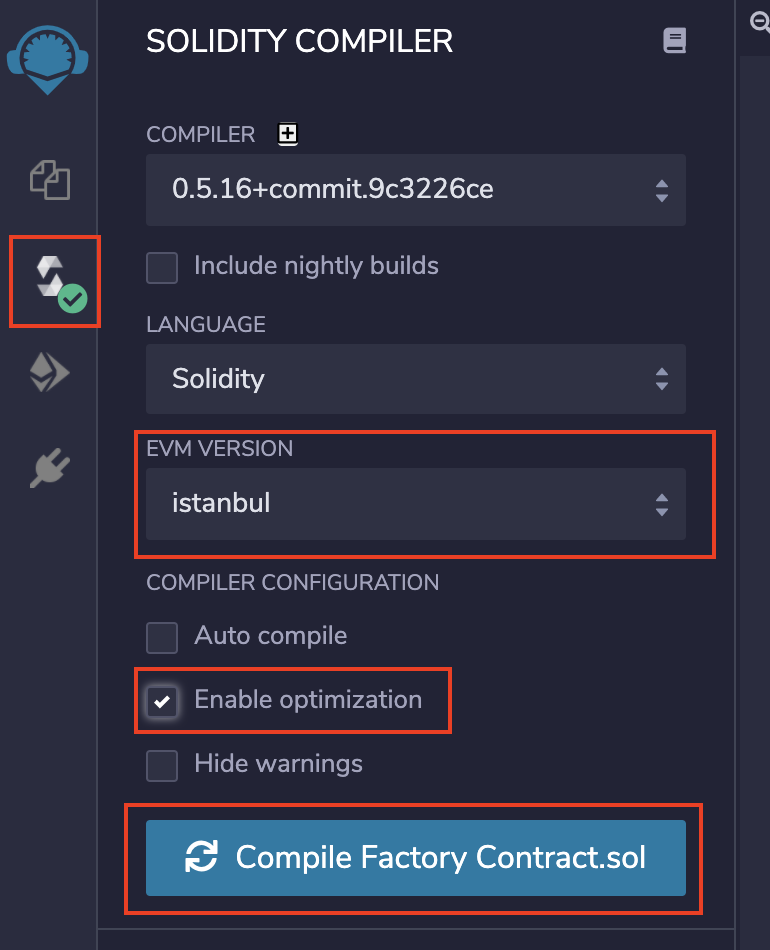
Before deploying the contract, we have to compile the contract. Go to Soliditory Compiler, Select "Istanbul" for EVM version, tick "Enable optimization" for Compiler Configuration and click the button "Compile".
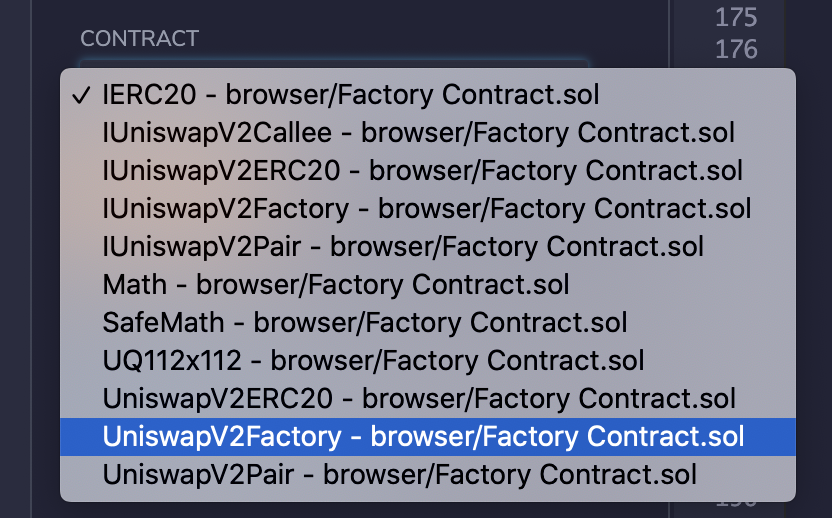
Then, go to Deploy & Run Transaction, select "UniswapV2Factory - browser/xxx.sol" under the contract.

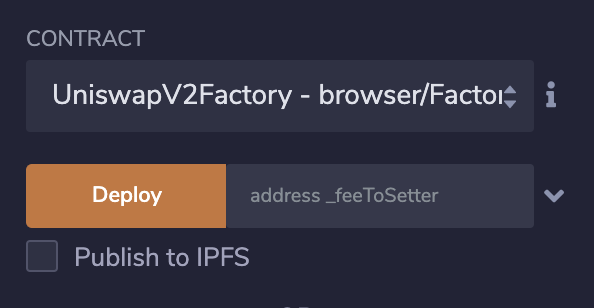
To deploy the contract, the parameter of _feeToSetter is needed, which is the manager of the contract. The address has the right to decide who could get the fee earned from running this exchange.
After the contract is deployed, there are two steps:
1. Execute the function call setFeeTo to assign an address to receive transaction fees.
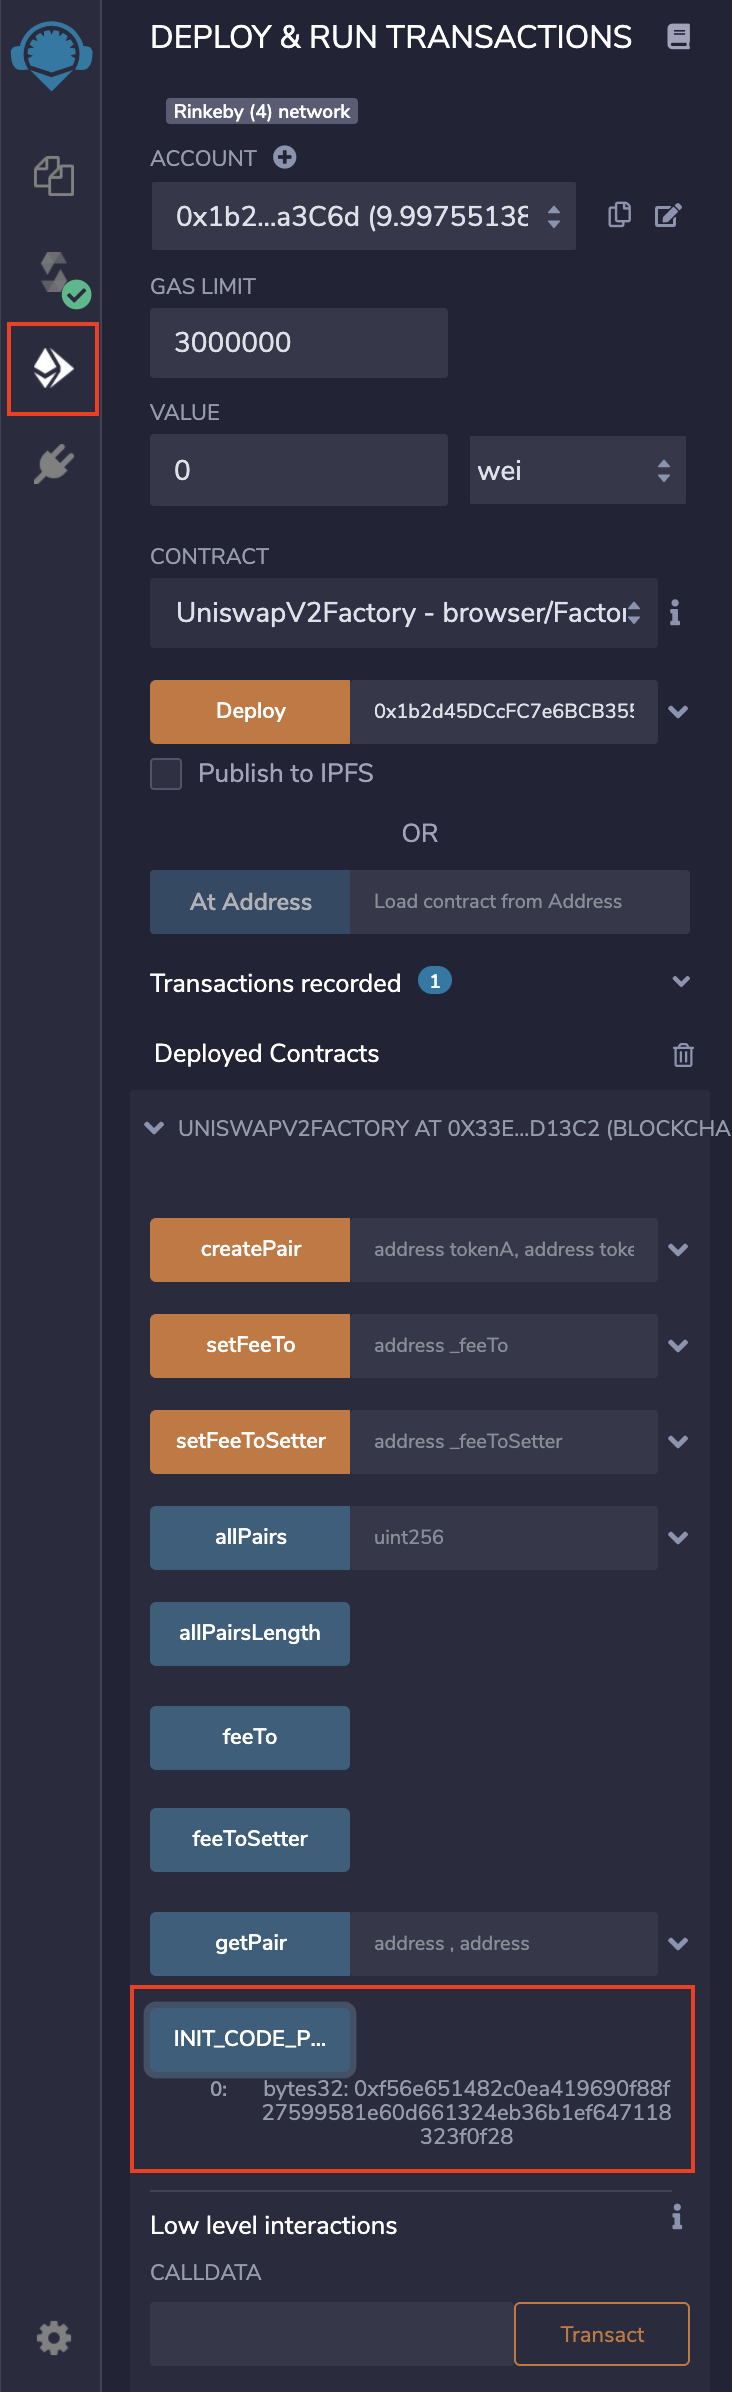
2. Call the value of INIT_CODE_PAIR_HASH and record it, we need it later.
You can find the value of INIT_CODE_PAIR_HASH as shown in the below image.
We then work on the Routing contract, Routing Contract Source code can get here: https://etherscan.io/address/0x7a250d5630B4cF539739dF2C5dAcb4c659F2488D#code
Search the code at line 700:
hex'96e8ac4277198ff8b6f785478aa9a39f403cb768dd02cbee326c3e7da348845f' // init code hash
We need to replace the hash with the one we got from the factory contract INIT_CODE_PAIR_HASH. Then the contract can be deployed. Two parameters are needed:
- Factory contract address that we just deployed
- WETH address
What is WETH?
The Uniswap exchange works well with ERC20 tokens, but ETH is not ERC20. Therefore, the exchange needs a WETH converter to convert eth to WETH, an ERC20 standard. The exchange rate is fixed at 1 to 1. Based on the network you are using, choose the WETH address below as the input parameter.
Mainnet:'0xC02aaA39b223FE8D0A0e5C4F27eAD9083C756Cc2'
Ropsten:'0xc778417E063141139Fce010982780140Aa0cD5Ab'
Rinkeby:'0xc778417E063141139Fce010982780140Aa0cD5Ab'
Goerli:'0xB4FBF271143F4FBf7B91A5ded31805e42b2208d6'
Kovan:'0xd0A1E359811322d97991E03f863a0C30C2cF029C'
After we compile and deploy the routing contract, remember to take a note of the addresses of both contracts and init hash code.
The next step is to work on the front-end of the codes:
We can download the code of the front-end by the commands:
git clone https://github.com/Uniswap/uniswap-interface.git
cd uniswap-interface
yarn

Contract address needs to be replaced, we need to replace the router contract address at line 6 of /uniswap-interface/hide/constants/index.ts
We also need to search for a factory address and init hash code for replacement. Make sure the code in node_module/@uniswap also been replaced.
After all, replacement, create a repository at your GitHub. And type the following commands at the folder of front-end codes.
cd uniswap-interface
rm -rf .git
git init
git remote add origin https://github.com/{username}/{project name}.git
yarn add gh-pages
yarn build
Then edit package.json, replace the value of the homepage to https://username.github.io/project name. After saving the file, type the following commands,
git add .
git commit -m "uniswap exchange deployment"
git put
yarn deploy
After everything is completed, you could access your exchange by https://username.github.io/project name with a MetaMask wallet.
Image source: Shutterstock